Showing posts with label craft magazine. Show all posts

Friday, January 4, 2008

Sew Inspiring!!!!

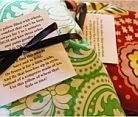
I am a HUGE fan of Amy Butler! I love her fabrics, designs, patterns, books, etc. Is there anything this woman can't do? Truly talented and so inspiring for so many women out there. I just stumbled upon this contest today and I just have to share it with all of you!


Craft Magazine and a few other sponsors JUST started this contest! Use one of Amy's patterns, her fabric, or just make something that was inspired by her very distinct style. Upload your photos into their flickr group and Amy HERSELF will be picking the top winner and the runners up! Sounds like the sky is the limit here! You can check out all the details about it here and the update on the contest here. Good luck and keep me posted if you enter your design!!!! I want to cheer you on!

and don't forget to check out my post below about a contest for the kiddos!

Thursday, July 26, 2007

Create your own coloring pages

I have recently seen a few spotlights on sites that create custom coloring pages and even a tutorial on how to do your own in photoshop on the Craft Magazine blog. I don't have photoshop but I still wanted to be able to create some fun coloring pages using pictures of my kids and other shots we have captured so I started tinkering around in irfranview which is a program I use to quickly resize pictures, fix the color, etc. I use it all the time and it was is free to download too. I discovered it was very quick and easy to create my own coloring pages using this program and I wanted to share a short HOW-TO tutorial with you.

Custom coloring pages

Step 1: open up your photo in irfanview and resize the photo if necessary. Click on the "image" botton at the top and then click on the "convert to greyscale" button. This makes your photo black and white.

Step 2: Click the image button again and put your mouse on the word "effects". This will bring up a pop up box off to the side. You will then want to click on "edge detection."
Step 3: Back to the image button - (we are quite familiar with this one now - LOL) and click on the word "negative" to apply that effect to your picture.
Step 4: You now have a custom personalized coloring page! It can easily be copied (ctrl button + the "c" button) and pasted into word. There you can resize it if necessary and print! If you would like your coloring lines to be darker please follow the next steps.
Step 5: To darken the coloring outlines Ist click on the image button and click on "enhance colors" This will bring up a box. You can darken your lines but dragging the tab in the gamma correction section to the left. (pictured as 2nd) This will darken your lines but may also add some shadow or graying to your coloring page. To lighten this shadowy color drag the tab in the contrast section to the right until you achieve the look you want. (pictured as 3rd) click the OK button to apply these changes to your page Step 6: You now have darker coloring lines and can copy, paste and print your coloring page! (see the coloring page in step 4 to contrast the look of the lighter lines and darker lines) Now break out those crayons and get to coloring!