WOW! one year of blogging, 300 posts later and it's party time!!!! It's been way to much fun sharing, connecting, meeting and chatting with all of you and so many more who stop by quietly. I appreciate you too! So.........on with the show right? Let's go!
I know you may think I have been dragging out the 300th post - you're right. I sort of have been. I *had* this great idea and wanted to create a tutorial but I had the darnest time finding the supplies. I use to be able to get them at my local hardware store but alas, those days are gone. I searched high and low and even drove to the neighboring cities to no avail. I guess that project will need re-vamped before it gets posted. Having said that, I had to come up with a new project to share for our big event here - hence the delay. But, what better for a party than Party HATS!!!! custom of course and sooooo whatever style/theme you choose! That's the best isn't it?
Custom Party Crowns
(Be sure to upload your photos from trying this project into the Brassy Apple Projects Flickr group!)
1. Start by gathering your "royal" supplies:
fabric of choice
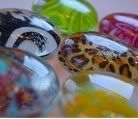
buttons
bias tape
rick rack
lace
extra fabric scraps
rhinestones
and other fun embelishments
You will need: fusible fleece or heavy fusible interfacing
 2. Create a pattern for your crown shape using a piece of paper. If you like winging it just skip this step.
3. Fuse your fleece or interfacing to the wrong side of your fabric per the manufacturers instructions. You may want to use 2 layers for a more stiff effect/feel. Play around with what works best for you.

4. Place your crown pattern on top of the fuse area, trace and cut.
5. Now the fun begins! Embellishing! Get your children involved! they'll love it! I added complimentary double folded bias tape to the bottom edge. Just place, pin and sew. Cut out other fun fabric shapes to put on your crown too. Using craft glue, hot glue, thread, heat n' bond, etc attach your embelishments. The skies the limit so go for it!


5. Measure the crown around your childs head to find a good fit. Pin and sew your crown closed. I folded under my edge for a nice clean finished look.

6. Hold an royal coronation ceremony and crown your newest King and Queen!


Now that the royal court has been tended to, it's time for a giveaway! For stopping by and saying hello I will be giving one lucky person a free DIY kit! You can choose from any that are in stock on my website! I will draw one lucky winner on Friday!!!! So hurry and post away!!!
**Be sure to include your email addy so if you win I can contact you!!!** thanks again! xo - Meg